Wearable Planter

Jewelry and Accessories for Green Thumbs

LET'S TALK ABOUT SHIPPING

colleen jordanComment

Something that I've begun to notice over the past few years is that there is a lot of inefficiency and waste involved in shipping. It seems like everyone I've talked to has had that shipping experience where a tiny object ordered from a big online retailer arrives packed in a much larger box than necessary, full of bubble wrap and plastic shipping products. Thankfully most online retailers are getting better about this. We've learned a lot from items shipped to us, as well as from the 2000+ products we've shipped out over the past year and a half. As long as we've been in business, we've been committed to keeping our shipping footprint as small as possible.

This week as I was buying shipping supplies, I decided to do a little bit of research into the shipping supplies that I use, and I'm really happy to report that they're actually more sustainable than I thought. Almost all of our items are shipped by USPS Priority mail, with the exception of some international orders. USPS will provide boxes to customers, so I decided to dig up a little information on these boxes that I've been using.

shipping-1_grande.jpg

Originally, I picked this box because it is small, and provides just the right amount of space and padding for our Wearable Planters without being too large. After some research, I found out that their boxes are Cradle to Cradle (C2C) certified. This means they use responsible methods in the manufacturing of their boxes, and that these boxes can be 100% recycled as well. Since the size is standardized, the postal service can easily stack these boxes in their trucks to maximize efficiency with each shipment, cutting down on the amount of fuel used.

Another neat thing I noticed about these boxes is that they're also cut to reduce the amount of waste. In the picture above, you can see how they fit together to minimize the cutoff waste paper.

Not all orders fit into these small boxes, and we were happy to learn from our supplier Uline, that the corrugated cardboard boxes we use are made from mostly recycled content, and are also 100% recyclable. They're also really strong and will survive multiple trips through the mail, so you can reuse them as well. 

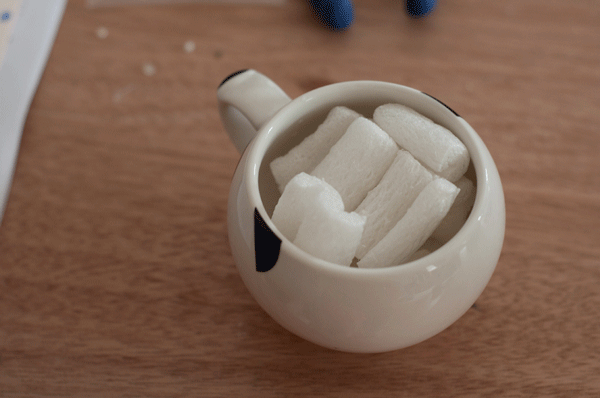
Finally, we use some pretty neat packing peanuts. Traditional packing peanuts that have been around since the 1960s are made using polystyrene. Polystyrene is a plastic that, although recyclable, is not biodegradable, so it could just end up in a landfill if not continually reused. Most of you know this type of plastic as styrofoam, of which the plastic cups littering highways are made.

We started using 100% biodegradable packing peanuts made out of cornstarch earlier this year, so you can either reuse them when sending a gift to a friend, throw them in your compost or yard, or just disintegrate them in water with no harm to the environment. 

We even included this silly .gif of our packing peanuts dissolving in water.

We even included this silly .gif of our packing peanuts dissolving in water.

Even though shipping will probably never be 100% sustainable, we're constantly trying our best to ship things as sustainably as possible.  Getting your item to you safely is a priority for us, and we want to make sure that we consider the environment as much as we can in this process. If you have any questions, please let us know in the comments or through email.

SUMMER VISUAL UPDATE

colleen jordanComment

We've been pretty busy these first few weeks of (official) summer. Around the studio, we've been working on new packaging and taking breaks to check out construction and movie sets. We have new items we're working on, and we took a trip to New York to check out the Bicycle Film Festival with Belle Helmets and get some inspiration in the cute little town of Hudson. We thought we'd give you a visual update and tease you about new projects we have ahead of us.

HOW TO PLANT GUIDE, PART 2: AIR PLANTS

DIY, What We're Making, How to Plantcolleen jordanComment

Bromeliads, better known as tillandsia, are one of the easiest plants to care for. These plants are found naturally in warm tropical places, but also do well indoors elsewhere. They can be easily found at most nurseries and online. We like to use air plants in our planters not only because they are so easy to care for, but because they look really cool, too.

Today we bring you the second of many installments in our How to Plant Series, and show you how to plant one of our favorite plants, the exotic and always interesting air plant. Since we have a few planters that call for using air plants, we thought showing you a visual guide is the best way to explain what to do once you get your planter. These instructions also apply to attaching tillandsia onto other objects, too, so you can follow these instructions to attach them to (almost) anything. Please note that we refer to using a hot glue gun in this tutorial, so pay attention while you're using this tool, and supervise any children who want to try this craft.

To start out, you’ll need a planter, an air plant, and a hot glue gun (or another adhesive like epoxy or E6000). For this tutorial we used this planter, which is designed to be used with air plants. These are the easiest plants to use in our planters, and these instructions will be really short and straightforward.

Start by plugging in your hot glue gun, and wait until it gets hot enough for the glue to be ready to use. While you wait for your glue to heat, play around with how your plant fits best in the planter if you haven't already.

You’ll add a drop of glue into the planter where you want your plant, and then position your plant inside where you want it. You’ll have to act quickly on this step before the glue sets, so have your plant nearby. After this, you’re all set!

You might be worrying about the effect of the hot glue on the plant, but it won’t hurt the plant. Other glues work well, too if you have access to them, like E6000 or other epoxies, but don’t use super glue.

Caring for your airplant  once you’ve mounted it is very simply. A small spray of water a few times a week will be enough to keep it healthy, and make sure it gets indirect sunlight when you’re not wearing it. 

And that’s it! Now you’re ready to wear an airplant! 

PEEK INSIDE THE STUDIO

Just for Funcolleen jordanComment

In March we moved into a new studio in the Grant Park neighborhood of Atlanta. Now that it's June, we've finally finished moving in and making it feel like a real workspace. The studio is a shared space with two other local artists who are growing their own creative businesses. We thought you'd like to take a little peek into where we work.

The building that we work in was orignally a church built in the early 1900s. We're lucky to get to work in a historic building, and we have great natural and ventilation- something you appreciate when you work with plants!

It's still a work in progress as we grow, and this is a snapshot of the studio this June. If you look closely to the pictures, you might get an idea of what we're working on next!

HOW TO PLANT GUIDE, PART 1: SUCCULENTS

What We're Making, DIY, How to Plantcolleen jordanComment

In the first part of our How to Plant series, we're going to show you how to plant a succulent in your wearable planter. We get this question a lot, and while we include directions in each planter on what to do, we thought a visual guide would help everyone out best. Planting a succulent in a planter is actually really simple, and shouldn't take you more than 5 minutes. 

To start out, we recommend getting everything together first. You'll need the planter you've chosen, some soil, a plant, water, and a pen or a pencil. For this tutorial, we're using a type of succulent called sedum that grows as a ground cover in many places. You should be able to find it at any nursery or home improvement center, but you can also find it growing in many places if you know what to look for.

Before you start, check your plant clipping for roots. Most succulents will begin growing roots a few days after they are cut. If they don't have roots, your plant will still grow them, and just plant enough of the stem below the top of the soil.

Step One: Insert plant clipping into the planter.

Step Two: Add soil. You'll only need a few pinches of soil, and make sure that the roots are fully covered.

Step Three: With your pen or pencil, gently compact the soil down to make sure it stays in place.

Step Four: Add a few drops of water to the planter.

And now you're done! Clean any excess soil and water from your planter, and it is ready wear. After a few days the roots will be more stable. Proper care is still needed to take care of your plant, and make sure it gets sunlight when not being worn. Of course you don't need to use these directions in just our planters. You can use these same steps for planting a succulent in a larger vessel, or even adding a little bit of charm to any other small object you can find.